Tuesday, November 2, 2010

Blue Oyster Mushrooms Growing on the Recycled Mushroom Block

Oyster mushroom blocks
When I went to Far West Fungi last month, I brought back a bunch of recycled mushroom blocks. These are the blocks they use on the farm to cultivate various mushrooms. They are made of saw dust inoculated with mushroom spawns, so the blocks are still full of mycilia even though the mushrooms have been harvested. It is not cost effective for the farm to use the blocks again, so they give them out to educational groups and MSSF members during our field trips.

Shiitake mushroom blocks
I have grown mushrooms on recycled blocks before. The first time I got them a few years ago, I had success in growing a lot of them. The second time I brought back a large amount of blocks due to my first success, but the entire batch was contaminated. I didn't get any mushroom to grow during my second attempt. Master Ken gave us some directions on how to get the blocks growing again.

I didn't bother to buy hydrogen peroxide this time since I did that last time, and they all got contaminated anyway.I soaked the blocks in water overnight in the recycling bins and put them inside of the garage. I covered them with large sheets of brown paper to keep the moisture in. I checked on them everyday and sprayed them with water using a spray bottle. When it started raining last week, I took them out in the bins to have them soaked in rain water. I then noticed the shiitake blocks were getting moldy. Bad sign. I took all the moldy ones out and started thinking a different and perhaps better way to store them.


Ideally, I would like to keep them outside so they can get rained on. I also prefer not to have the moldy smell in the garage in the case that they get all moldy again. There isn't a whole lot of shady spots on Sand Village Farm. I have the worm compost bins underneath the Loquat tree. The only other spot is under the peach tree, and I know all the leaves are going to fall off during the winter. Well, it will have to do for now. So I set up two pallets underneath the peach tree, one for oysters and one for shiitake. Ideally you cover them with hay, wood chips, or a burlap bag, but I don't have any of those handy. So I grabbed a bunch of dried palm tree leaves that came from my neighbor's tree and covered the blocks with them. Maybe I could weave these palm leaves? Would this work? I thought it was going to rain more, but I don't see any more rain in the forecast.


For the last few days, I watered the blocks when I watered the other vegetables. This morning as I was leaving the farm to go to the cubicles, I thought I would peek under the palm leaves. Ha! Baby blue oysters! They are growing!

Monday, November 1, 2010

Homemade Karanji for Diwali, Festival of Lights


I was pleasantly surprised when I arrived at my cubicle world this morning. My Indian cubicle mate, who taught me the Indian eggplant dish, handed me a brightly colored box. When I opened it, there were two pieces of pastries inside (I ate one before remembering to take a photo). She told me that they were filled with coconuts. I immediately ran upstairs to get a cup of coffee to go with the pastry. The pastry is not greasy at all. I thought they were baked although they looked like they were fried from the blisters on the shell. The coconut flakes inside were moist, spicy, and sugary. After I finished the first piece, I went over to obtain some information about the delicious morsel.


"Was there ginger in the pastry? It's sweet and spicy!" I asked her.

She was surprised to hear the mention of ginger as there was no ginger in the ingredients. There were just coconuts, sugar, jaggery, cardamon, and saffron." Oh, so it was cardamon not ginger that I was tasting. I couldn't believe how off I was. Must be still half asleep.

"What is jaggery?" I asked her. Jaggery (also translated as jaggeree) is a traditional unrefined non-centrifugal sugar in India. It is a concentrated product of cane juice without separation of the molasses and crystals. It's available in Indian grocery stores in blocks. You shave it from the block to use as a sweetener. It sounds great and tastes excellent. I will have to pick some up to experiment with.

I asked her whether the pastries were baked. It turned out they were fried. I was surprised again! She explained to me that the dough was made with all purpose flour mixed with an Indian flour similar to semolina. She went on to explain how the dough was stretched to make it pliable.

After hearing the process and ingredients in details - saffron, shaved jaggery, fresh coconut flakes and pastry made from scratch, I realized this was no ordinary everyday dessert that I just ate! I asked her if this was for a special holiday? Surely enough, the pastry, called Karanji, is for Diwali, which is a five day Hindu festival, often referred to as the Festival of Lights. She admitted it was a lot of work which normally is a community effort in Indian. A group of women would gather and spend a day making Karanji and socialize. She made karanji with a friend during the weekend to celebrate the holiday.

Wow, I feel incredibly special to have the opportunity to taste this authentic homemade Indian treat and learn more about the culture and history behind it. This is one of the reasons I feel fortunately to live in the Bay Area. You can experience world cuisine and culture without having to fly anywhere.


Sunday, October 31, 2010

How to Make Candy Cap Mushroom Cookies


To kick start the rain season, I decided to dig into my candy cap reserve and bake some cookies for my mushroom cultivation class. Most of the students are beginners in mycology and never had candy caps or candy cap cookies. I figured this would be a good way to get them excited. I was super excited when I first learned of this amazing little dessert mushroom!

Candy caps (Lactarius rubidus) are found on grounds or rotten wood in forests, usually in groups. In California it is abundant under oak and pine, where chantrelle (oak) and porcini (pine) are. Some of its key features are:

1. Cap and stalk burnt orange to orange-brown or sometimes reddish-brown.
2. Cap small (usually <2 1/2" broad), the surface dull and dry.
3. Fresh gills exuding a watery white milk when cut.
4. Neither the milk nor the flesh change color when exposed.
5. Entire mushroom brittle, the stalk snapping open cleanly like a piece of chalk.
6. No veil, ring, or volva.
7. Odor sweet (like maple syrup), especially when cooked or dried.
8. Spores white.

Saute the chopped up mushrooms with some butter
You may also find candy caps in mushroom specialty stores like Far West Fungi. I picked an abundant amount of candy caps in January this year. I dried all of them since their maple syrupy aroma gets stronger after they are dried. They are excellent in cookies, breads, waffles, pancakes, cheesecakes, pancakes, and ice cream.

This Candy Cap Cookies recipe is in David Aurora's All That the Rain Promises and More... I have made it several times and have some tips to ensure your success in making these cookies.

I finely chopped the pecans in the coffee grinder

Ingredients:
1 cup dried candy caps
1 cup unsalted butter at room temperature
1 cup sugar
1 egg
1/2 tsp vanilla extract (optional)
2 1/2 cup all purpose flour
1/2 cup finely chopped nuts (optional)

Everything is blended in and mixed well

Directions:
Rehydrate the mushrooms by soaking them in lukewarm water for 15 minutes. Chop up the mushrooms into tiny pieces and saute them in a little butter. Set aside.

Cream together 1 cup butter and 1 cup sugar. Beat in 1 egg and, if you like, add 1/2 tsp vanilla extract. Stir in 2 1/2 cups of flour in small batches. I add 1/2 cup at a time into the mixer and let it mix well before adding the next 1/2 cup. It's very important that you don't dump all 2 1/2 cups at once. If you do that, the dough will fall apart. After the flour is all mixed in, you can stir in some finely chopped nuts. I usually add some pecans. Stir in the mushroom bits and mix it well.


Form the dough into rolls about 1 to 1 1/2" in diameter. I personally prefer not to get the dough all over my hands because I don't want to waste any dough if possible. I use a bamboo sushi roller to roll up the dough in a sheet of wax paper - just like how you make a roll of sushi. Use the wax paper as if it was a sheet of seaweed, put it on top of the bamboo roller, scoop up a desirable amount of dough and spread it out across the paper with a spatula. The roller is a handy tool in rolling up the cookie dough without it melting in your warm hands. The bamboo roller is available in Asian markets for about $2. Fold down the ends of the wax paper and freeze. When ready to bake, remove rolls from freezer and slice them to no more than 1/4 inch a piece. Place them on ungreased cookie sheets. Bake at 350 degrees for 8-10 minutes or until very lightly browned around the edges. Makes about 6 dozens.


There is nothing else that smells like these cookies. I love surprising people with them and look at their puzzled faces as they try to figure out what makes the cookies so good. The surprised expressions on their faces after learning it's a mushroom is simply priceless.

Wednesday, October 27, 2010

Lisa Leonard's Award Winning Kombucha Tea


I just learned about Kombucha back in January this year. "Kombucha" was mentioned a lot in Master Ken's class. I looked it up on Wikipedia, and it looked a bit scary to be honest. That thing they call "mother" or "Kombucha mother" in a glass jar is quite alien looking. Some people call it "mushroom." I can tell you that it is NOT a mushroom. It's actually a "Scoby" - Symbiotic Colony of Bacteria and Yeast. Does that sound any better? Not really.

When Lisa, who was in my class, heard that I never had Kombucha tea, she told me that she's been brewing and drinking Kombucha regularly. She said she'd be happy to bring some for me to try. She told me that I could also get them in grocery stores. A few days later, I saw an article about Lindsey Lohan's favorite Kombucha drink, Synergy. My curiosity level was getting higher by the day. Finally, I picked up a bottle of guava flavored Synergy Kombucha for $4 while in San Francisco. It tasted nothing like Guava. It was just pure almost unbearable sourness (and I can take a lot of sour!). I gave up on drinking it after 4 sips.

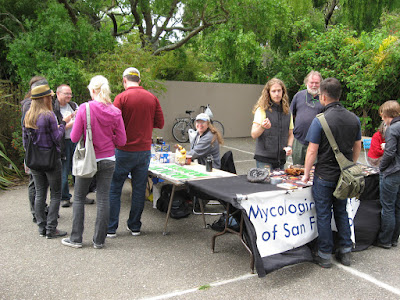
Lisa (center) hosts a kombucha tasting at Summer Garden Fair at Golden Gate Park, 2010.
Lisa and several others brought their Kombucha tea to our Fermentation Club that meets once a month. I was skeptical. I tried Phil's Kombucha, and it was very sour. I tried Jenny's Kombucha, and it was not as sour. It was almost good. I tried Lisa's Kombucha, and I wanted more! It had the perfect balance of sour, sweet, and tangy. It turned out that Phil's Kombucha was brewed too long; hence, it basically turned into vinegar. Jenny's tea was brewed a bit longer than it needed to. Lisa, who's been experimenting longer than others, figured out the small window when the tea is just perfect. She would then pour the tea out from the "Mother" jar so it would not keep fermenting; furthermore, she mixes different herbs and spices, fruit juice, vegetable juice, etc., to create unique flavors.

So why drink Kombucha? Many people in my Fermentation Club strongly believe in the health benefits of Kombucha. Common claims are that Kombucha aids cancer recovery, increases energy, sharpens eyesight, aids joint recovery, improves skin elasticity, and aids digestion. After tasted Lisa's Kombucha, I have been drinking it just because it tastes good. I have never been too crazy for carbonated soda water. Why drink soda? It's bubbly and high in sugar. I don't think anyone can claim any health benefit of soda water. When I drink Lisa's Kombucha, I feel a bit more energetic. And how can you resist these flavors - Ginger Aid, Strawberry Bliss, Sangria Fiesta, Orange Julius, Key Lime Pie, Old Fashioned Root Beer, Grape Soda, Berry Blast, etc., etc.


Lisa's been very generous with free tasting of her tea. Her husband, Joe, is just as enthusiastic as she. He makes sure that you get to try every flavor. Master Ken and others have been giving her a lot of feedback on the taste and ideas on what herbs she might be able to try. When Joe announced to everyone that Lisa's Ginger Aid Kombucha won first place at Eat Real contest this year, I couldn't be happier for her! I knew then that I wasn't being biased about how good it is. Lisa of course is too modest to toot her own horn, so I will do that for her.

If you are in the Bay Area and curious about Lisa's Kombucha, send her an email at LisaLeonard1@ymail.com to get on her email list for updates. Give something new a try, you may be in for a surprisingly pleasant experience.

Tuesday, October 26, 2010

"Extreme Gardening"

Daikon seedlings

"Extreme Gardening!" was what my next door neighbor said to me when he saw me digging soil and pulling weeds in the dark. Well, at least I am not doing it in down pour rain. Now that would be a real challenge.

Before I left for New York last month, I started some daikon and green onion seeds in the campus greenhouse. I brought them back on Sunday but haven't had much daylight hours to plant them in the veggie beds. As it was getting dark tonight, I hurriedly pulled out partially dried up tomato plants and filled the bed with compost from El Cerrito Recycling Center.  I planted just a few daikon seedlings on one side of the bed before it became completely dark out, and I was finally overcame with hunger.

Green onion seedlings
I have also planted a  bunch of green onion seedlings in the potato and onion bed.  I dug up some potatoes and onions to make room for the green onions. Since they came right out of the veggie patch, they were covered with my primo soil. I wouldn't want to rinse the soil down the kitchen drain, so I washed all fresh produce outside in a bucket then poured the water right back into the veggie beds or potted herbs.

The rain is supposed to start again on Thursday afternoon through the weekend. It looks like tomorrow night is another "extreme gardening" night.

rising some freshly picked veggies - both potatoes and onions do grow underground